Add New Software / Publication And Link It |
In the HTML Executable Activation Kit, software, publications and ebooks are managed within the Software page.

This page lists all of the software managed through the Activation Kit. Click New Software to add a new one, View to see its properties or Edit to modify one.
Add or modify a publication / ebook / software
When adding or modifying a Software, you can input details of the publication or e-book you wish to make available for online activation.
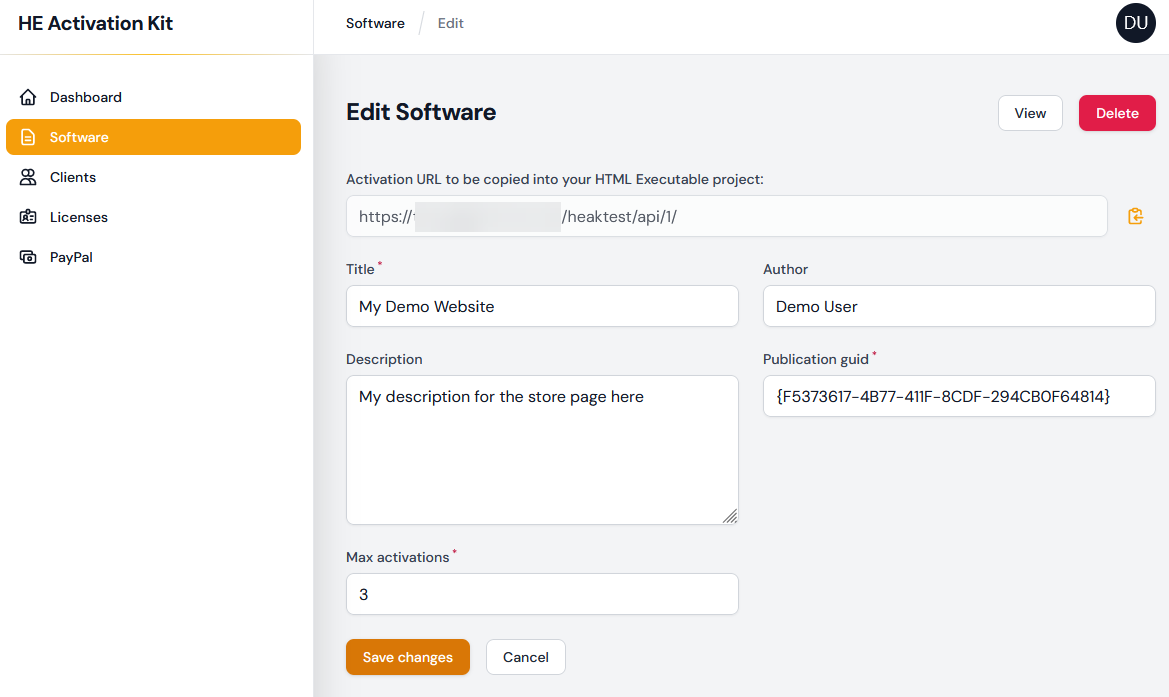
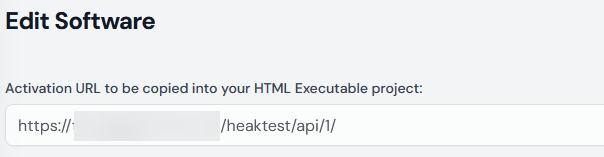
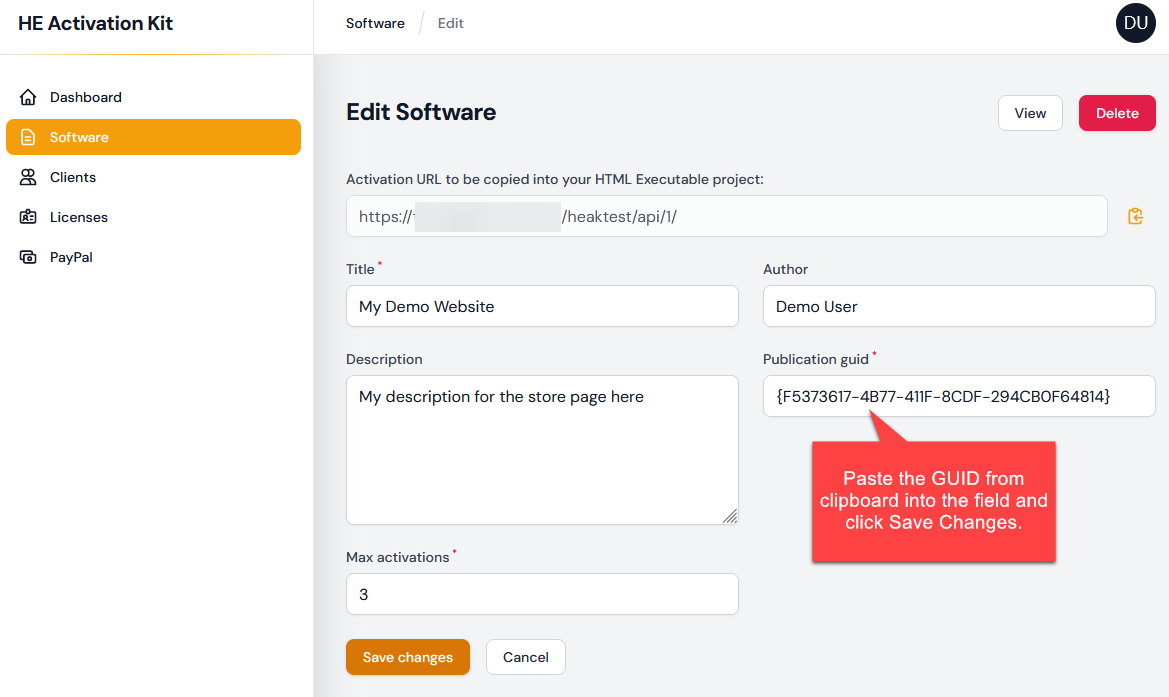
Activation URL to be copied into your HTML Executable project: This is the unique URL that needs to be integrated into your HTML Executable project. It serves as the endpoint for the online activation process of your software or publication (see below). You can easily copy it to the clipboard with the dedicated button.
Title: A mandatory field that represents the name or title of your publication or e-book. It helps you identify the specific content.
Author: This field is for the name of the individual, group, or organization responsible for creating the publication. It provides context and credit to the creator.
Description: A brief overview or summary of the publication's content. This helps users understand what the publication or e-book entails at a glance.
Publication GUID: The unique identifier of the publication or ebook as defined in the HTML Executable project (see below).
Max activations: The maximum number of times the publication can be activated per user. This helps in controlling and limiting the distribution and access to the content.
Configuring Your HTML Executable Project for Web Application Linking:
To ensure that your HTML Executable project can effectively communicate with the web application for activation purposes, you need to make certain configurations inside it and recompile your publication / ebook.
1.👉Activation URL: This URL is provided by the web application and serves as the endpoint for the activation process. You must copy this URL and insert it into the designated field within your HTML Executable project;
2.
3.
1) Edit the HEPX project file of your publication with HTML Executable 2023. Go to "Security > Certificates":

Double-click on the Registered (1) certificate you want to add online activation to.
2) Write the certificate ID down because it is required each time you add a user to the database.
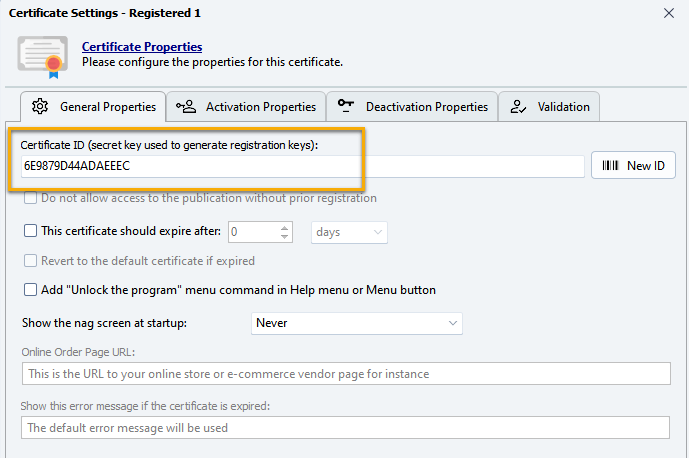
3) Choose "Activation Properties". Select "Online Activation" as the method for activation and enter the activation URL dedicated to your publication on your server, as given by the application (see above).

WARNING: the URL should be pointing to a directory, not a file.
http://path/to/heakdist/mypublication/ is correct
http://path/to/heakdist/mypublication/heactivate.php is wrong.
4) Click OK and rebuild your publication.
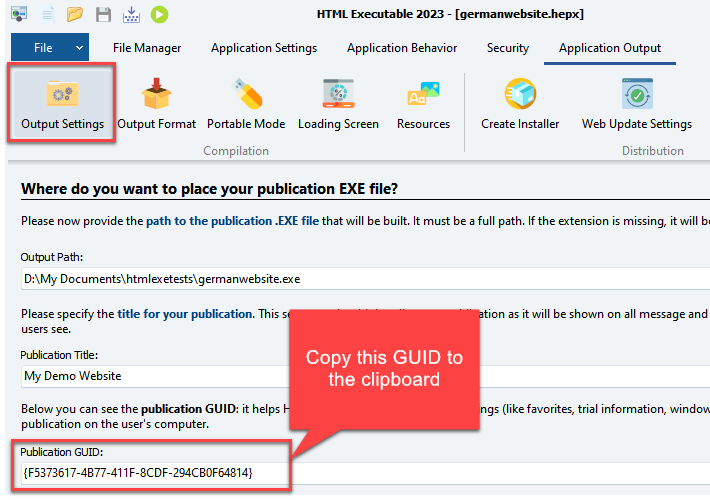
1.👉 Publication GUID: The GUID (Global Unique Identifier) is a unique code associated with each publication or e-book. This identifier ensures that the correct publication is referenced during the activation process. You'll need to take the GUID provided by the corresponding field in your HTML Executable project and input it into the web application. The GUID of your publication can be found in HTML Executable by going to "Application Output" > "Output Settings":
Edit the corresponding Software item in the web application:
By configuring these two elements, you're creating a bridge between your HTML Executable project and the web application. This ensures that activation requests are correctly managed, validated, and recorded.
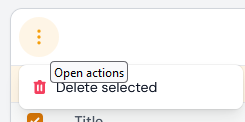
💡To delete a software, you must select it and click the menu icon to have "Delete selected". Then, confirm the deletion.
|
Once associated with the web application, your publication can handle the different online licensing features of HTML Executable: not only activation, but deactivation and validation are automatically handled too. Do not hesitate to take a look at these features to secure your ebooks.
👉 Now, you need to add clients to the application. It can be manually done with the online administration panel or automatically with the PayPal option.